Hey everybody! I don't know if anyone else has magazine's in their bathrooms, but I do and I was in there yesterday while giving the kid's their bath and was looking at all my magazine's I don't read anymore...and was wondering what I could do with them other then just tossing them. So I looked up idea's and here is one of my favorites, because I can always use space...so here is my How To on how to use your old magazine's to make a magazine box.
Here is what you'll need:
Clear Tape
Magazine Pages
Colored Duct Tape (Optional)
Some sort of cardboard
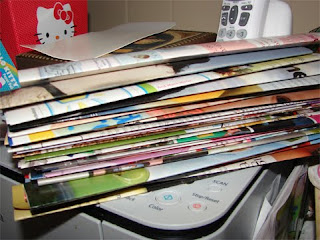
I made my box out of a Pregnancy magazine which I have had since I was pregnant with my daughter. This particular magazine was one I didn't want to toss because I remember reading it a lot during my pregnancy because it had a lot of great articles, and it's just a fond memory. I know, probably kinda dumb but it always make's me think of that time when I see it. So I used that and figured this would be a nice solution because it was getting really worn just sitting in the magazine rack in the bathroom. You can use any type of magazine you want though. Your going to start by ripping out a lot of pages. I tried to pick ones with bright color's on them, you could choose only black and white or two different colors. It's your choice, your box!


After pulling out your pages, your going to fold them long way to about the size shown in the picture above. You'll need a BUNCH of these. You'll also need to take your cardboard and cut out four sides and one bottom so you know how big to weave them together. I used the cover of a composition book I was about to toss and it worked great, so you can use any type of hard material for your box.
 This is my pile of them to the left. This pile didn't take me very long to fold at all. Maybe about ten minutes. After this step your going to take several of your strips and lay them down together. I did a set of three and taped them down to my desk, them took another three and weaved them together.
To the right are mine after being weaved together. You want to weave enough together to fit around your peices of cardboard. After you have enough together, and the right size you'll lay down your card board and tape the weave around it. I also might need to add that I used scotch tape to kind of secure the magazine for the moment while I was weaving. It keeps it in place and lets you manage it easier, plus it's clear so it doesn't effect how it looks after your done.

Place your board in the middle and fold the sides of your weave and tape them down. You can weave enough strips together to cover what will be the inside of your box, or you can leave it plain it's up to you. I made my strips long enough to cover both the inside and outside of the walls of my box.
 This is what the "outside" of the wall should look like when your done. After you have done this to all the pieces of your box, take your clear roll of tape and cover each piece with it, make sure no naked magazine paper is uncovered. Once you have all the sides and bottom of your box taped completely, you can then take the clear tape and start to tape the walls of the box together. After you've taped your four walls together you can add on the bottom and you should be done! You might need help holding the walls up while you tape them together.
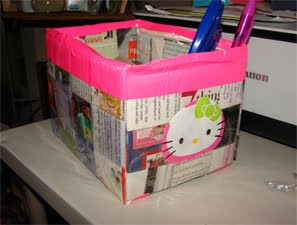
I added some pink duct tape all the bottom and top brim of my box, along with a Hello Kitty head that I had cut out of a party hat I had just to add some decoration to the box, but you don't have to if you don't want to. You could leave it place, or add some type of your own decoration. The entire box took me about 45 minutes to complete.

Here's a top view of my box. I hope you have fun making this project!!

0 comments:
Post a Comment